
Post all of the source images
(20pts), the URL link of the tutorial (5pts), and comment (10pts) to your blog
along with the final product. Comment on
the text font used, the techniques used, and your overall thoughts on the
project.


.jpg)

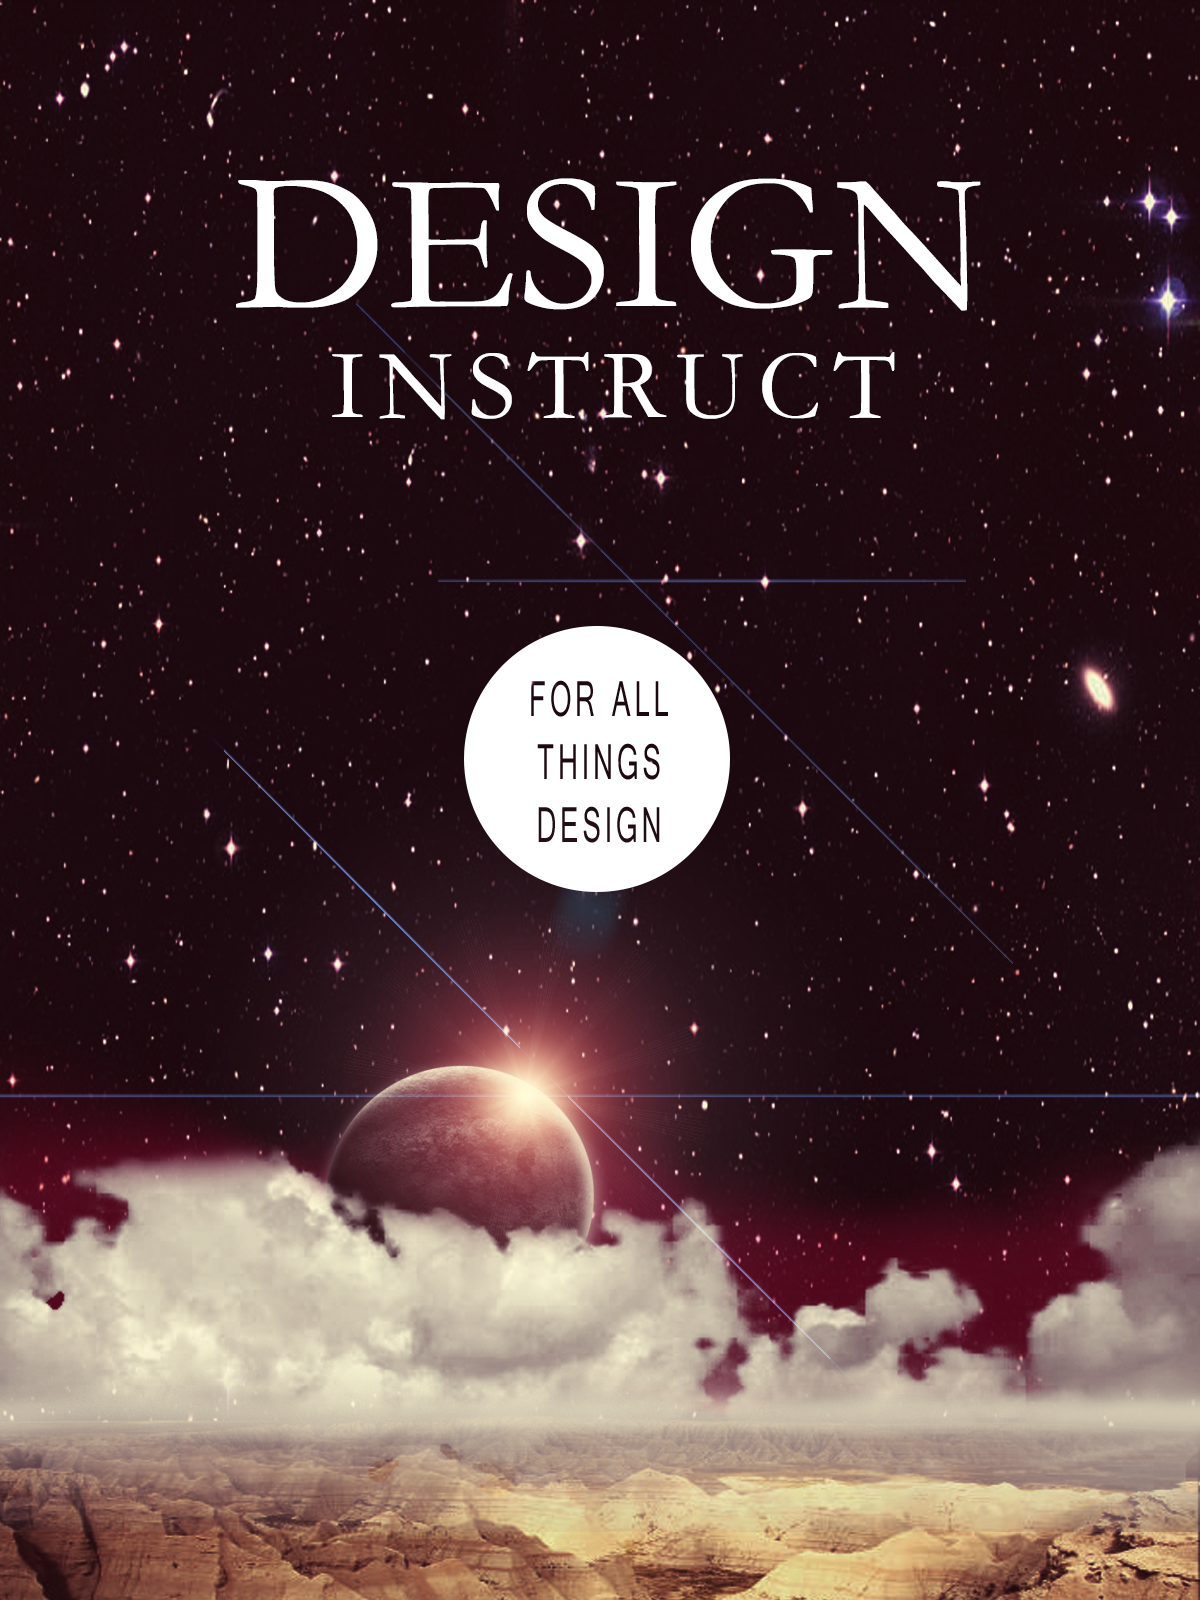
I started by opening a new document in Photoshop. Then, I inserted the starry sky image and fit it to the canvas using free transform. Then to edit the stars, I chose Image>Adjustment>Curves. This darkened the image resulting in the stars standing out more. Additionally, I dropped the color down, by going to Image>Adjustment>Hue/Saturation. I lowered the Saturation to -50. Next, I added a color gradient. I added a New Layer and double-clicked on the layer to open up the Layer Style dialog window. I added a gradient overlay. I used yellow, magenta, and teal in the gradient overlay. I opened the "Badlands" image in Photoshop and used the Pen Tool to select the rocky landscape out of the image. I moved this image to the original document. I used Free Transform to scale the image. I chose Image>Adjustment>Curves and changed input and output. I chose Image>Adjustment>Hue/Saturation and changed the Saturation to -40. I opened up the clouds image and went to Image>Adjustment>Levels. I set up all the different droppers and then used the Rectangular Marquee Tool to select around the sky of the image and then cropped the image (Image>Crop). I went to Select>Color Range. I clicked on the blue area in the document and changed the "Fuzziness" option to 115. Next, I chose Select>Inverse to invert the selection and chose Layer>New>Layer via Copy. Then I went to Image>Adjustment>Hue/Saturation and dropped the Saturation down to -100. I moved the clouds into the original document using the Move tool and used Free Transform to size them. I went to Layer>Layer Mask>Reveal All to create a vector mask on the layer. I used the Brush tool to paint away the top and bottom of the clouds. I used the Gradient tool with a foreground color of white and made a gradient from the bottom of the clouds to towards the top. I opened the texture image and used the Elliptical Marquee Tool and select a circle of the image. I copied the selected areas by going to Layer>Layer via Copy. On a new layer, I used the Rectangular Marquee Tool to make a few random black rectangles across the planet. I applied a Gaussian Blur of 20px. Then, I removed unwanted parts of the stripes. I dropped the Saturation to -100 and I added a Spherize filter. I added a drop shadow, inner shadow, a color overlay with a slight hue of red, and a gradient overlay. I created a new black layer and changed the Lens Flare to Movie Prime. Next, I changed the Blend Mode to Screen and positioned the Flare. I added a new layer and set my Foreground color to pink. I created a radial gradient and dropped the layer's opacity to 60%. I went to Layer>Adjustment Layer>Gradient Map chose purple to yellow gradient and dropped the layer's opacity to 15%. Using the Horizontal Type Tool I typed "Design Instruct". I put a circle on the document and centered it, and created a vertical guide right. I put in the subtitle "FOR ALL THINGS DESIGN." Next, I chose Layer>Layer Mask>Reveal All and clicked on the subtitle layer. Then, I went to Select>Load Selection. I filled the circle layer mask with black and hid the text layer. This made the the background show in place of the text. I used the text tool to add the date that the movie would enter theaters. I really liked this tutorial and think my overall image turned out really cool. The hardest part was the last step with making the background show through text. The easiest things were the steps at the beginning that changed up the sky a little.
No comments:
Post a Comment